
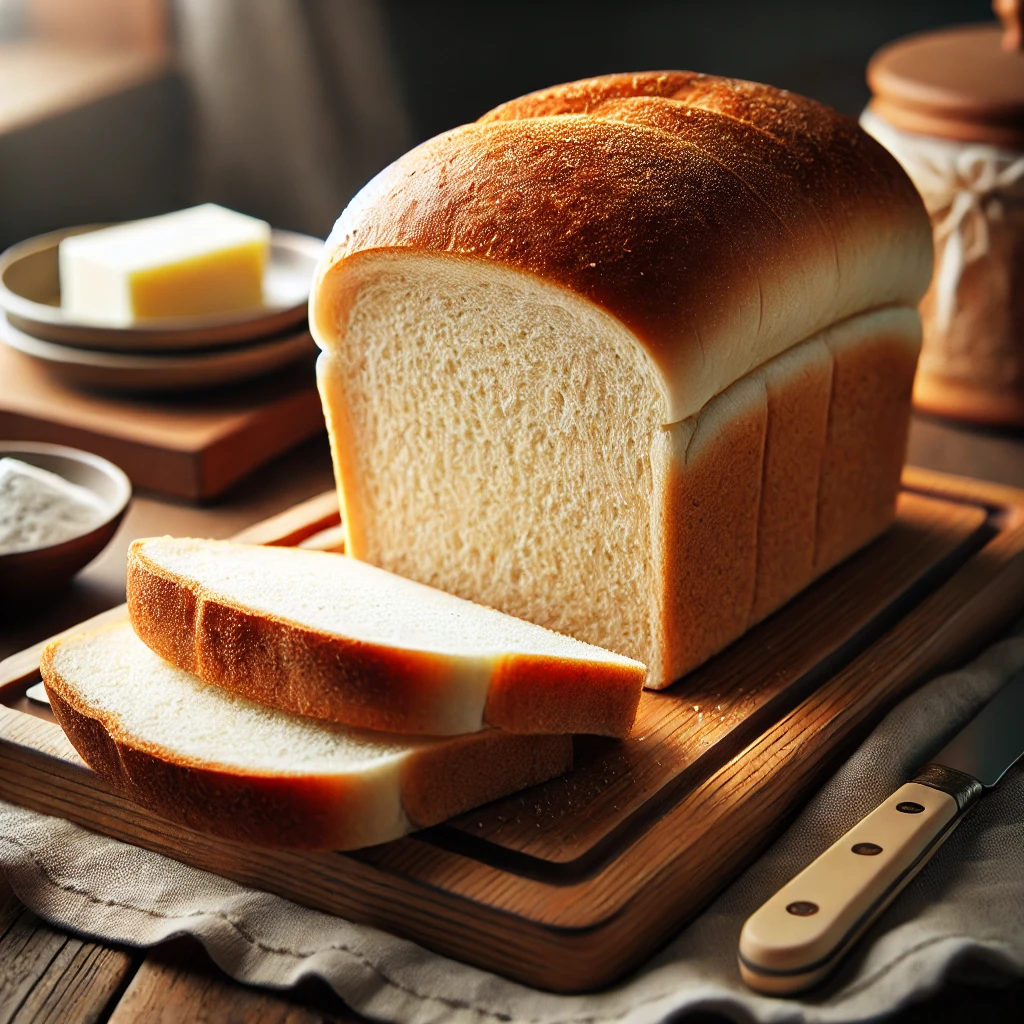
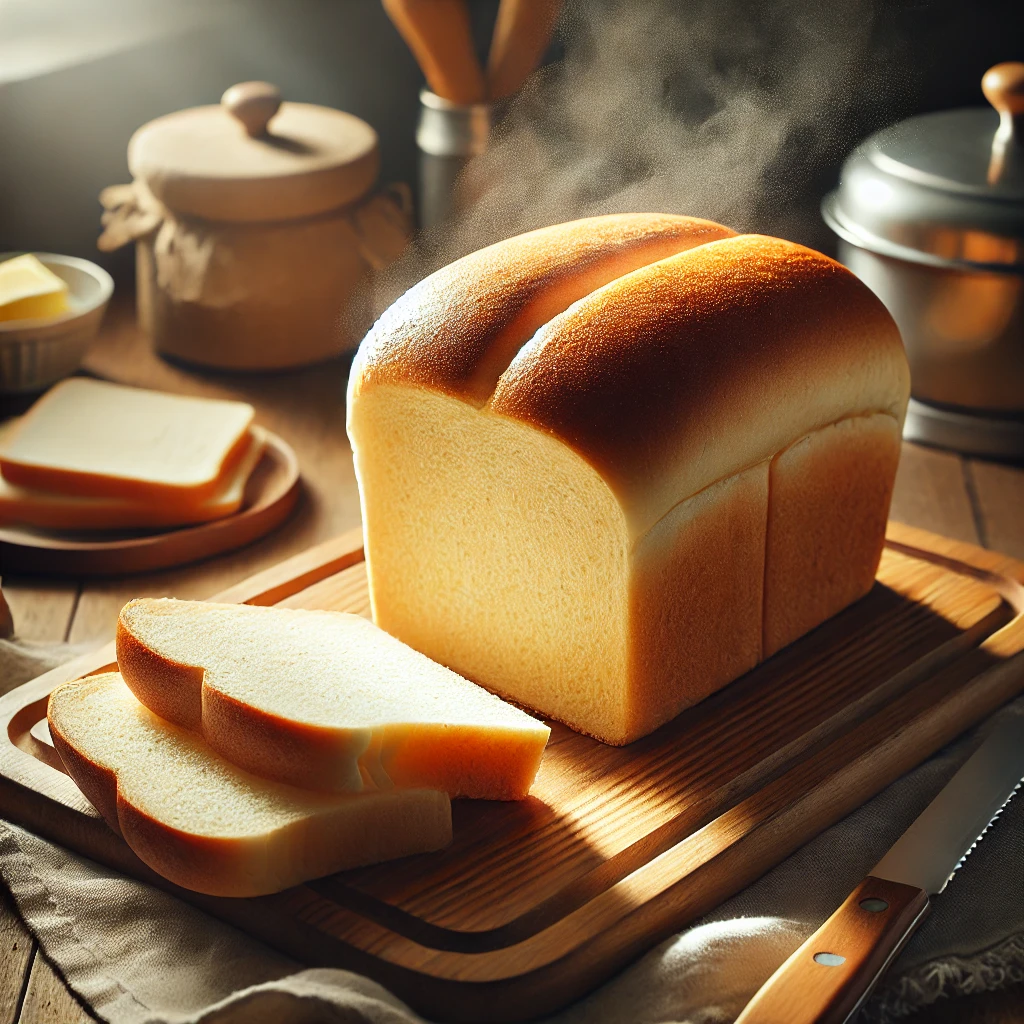
Sandwich bread recipe

Who doesn’t love the smell of freshly baked bread? Making your own sandwich bread recipe at home is a rewarding experience. Not only is it more delicious than store-bought versions, but you also control the ingredients, ensuring it’s healthier for you and your family. But what makes sandwich bread stand out? It’s all about the soft, fluffy texture and the perfect thickness that holds up to all sorts of sandwich fillings.

Ingredients for sandwich bread recipe
Basic Ingredients Overview
To get started, you’ll need a handful of ingredients that you likely already have in your pantry. Here’s what you’ll need:
- 4 cups all-purpose flour (or bread flour)
- 2 teaspoons active dry yeast
- 1 tablespoon sugar
- 2 teaspoons salt
- 1 ½ cups warm water (around 110°F/45°C)
- 2 tablespoons unsalted butter (room temperature)
Choosing the Right Flour
For the best texture, use bread flour as it contains more gluten, which helps create that perfect, chewy bread texture. All-purpose flour works too, but you might notice a slightly less stretchy dough.
Equipment You’ll Need for sandwich bread recipe
Essential Tools for Perfect Bread
You don’t need fancy equipment to make great sandwich bread recipe. However, a few basic tools will make the process easier:
- Mixing bowl
- Measuring cups and spoons
- Stand mixer with a dough hook (optional but helpful)
- Bread loaf pan
- Oven thermometer
- Cooling rack
Why a Bread Machine Isn’t Necessary
While bread machines are convenient, they’re not essential. This recipe will walk you through the traditional way of bread-making, giving you full control over the process.
How to make sandwich bread recipe
Preparing the Dough
Start by mixing the yeast, sugar, and warm water in a bowl. Let it sit for about 10 minutes until the yeast becomes frothy, indicating it’s active. Then, slowly add in your flour and salt, mixing until the dough starts to come together.
Kneading Techniques
Kneading is key to developing the gluten in your dough, which gives it that elastic texture. If you’re using a stand mixer, knead for about 5-7 minutes. If you’re doing it by hand, expect to knead for 10-12 minutes. The dough should feel smooth and slightly tacky.
First Rise Process
Once kneaded, place the dough in a lightly greased bowl, cover it with a damp cloth, and let it rise in a warm spot for 1-1.5 hours, or until it doubles in size.
Shaping the Dough
Tips for Perfect Loaf Shape
After the first rise, punch down the dough to release the trapped gas. Then, shape the dough into a rectangle and roll it into a tight log. Make sure the seam is at the bottom when you place it into the loaf pan.
Avoiding Common Shaping Mistakes
Don’t rush the shaping process. Be gentle, and make sure to tuck the ends under the loaf so it holds its shape while baking.

Second Rise: Why It’s Important
The second rise, or proofing, ensures your loaf has the right volume before baking. Let the shaped dough rise for about 45 minutes, or until it has risen slightly over the top of the pan.
How to Know Your Dough is Ready
A good way to test is to gently press the dough with your finger. If the indentation slowly springs back, it’s ready to bake.
Storing Your sandwich bread recipe
How to Keep Your Bread Fresh Longer
To store your bread, wrap it in a clean kitchen towel or place it in a bread bag. It should stay fresh for up to 4 days at room temperature.
Freezing sandwich bread recipe
You can freeze your bread for up to 3 months. Slice it before freezing, so you can easily thaw only the amount you need.
Customizing Your sandwich bread recipe
Firstly, feel free to get creative by adding extras like sesame seeds, poppy seeds, or dried herbs to the dough for a unique flavor. So, these small additions can enhance the taste of your sandwich bread. Then, for a healthier twist, you can substitute half of the all-purpose flour with whole wheat flour. Also, if you need a gluten-free option, be sure to use a gluten-free flour blend that’s specifically designed for yeast bread.
Basically, using these substitutions will still give you delicious results. Afterward, during the baking process, ensure that the ingredients mix well with the dough for a consistent flavor. After that, you’ll notice a difference in the texture and taste. Finally, enjoy the wholesome goodness of your homemade bread, knowing it’s tailored to your preferences.

Health Benefits of sandwich bread recipe
At first, store-bought bread often contains preservatives to extend its shelf life. However, homemade bread, on the other hand, is free from unnecessary additives. So, by making it yourself, you avoid consuming chemicals that aren’t needed.
Another benefit is the nutritional value of homemade bread. Because you control the ingredients, you can ensure your bread is packed with nutrients like fiber, vitamins, and minerals. Accordingly, this makes homemade bread a healthier option compared to most store-bought varieties.
Perfect sandwich bread recipe
Classic Sandwiches
Try classic sandwiches like turkey and cheese or a BLT to highlight the softness of your homemade bread.
Creative and Healthy Sandwich Recipes
For something different, try hummus and roasted veggies or a chicken and avocado sandwich. The fresh bread will make any filling taste better!
Conclusion
Making homemade sandwich bread recipe is a labor of love, but it’s well worth the effort. With practice, you’ll master the art of bread making, and soon, store-bought bread will be a distant memory. Follow these steps carefully, and you’ll be rewarded with soft, fluffy, and delicious sandwich bread recipe every time.
FAQs about sandwich bread recipe
Dense bread is often a result of under-proofing or over-kneading. Make sure the dough has risen sufficiently before baking.
Absolutely! While a stand mixer makes kneading easier, you can knead the dough by hand with great results.
Wrap it in a kitchen towel or use a bread box to keep it fresh for up to 4 days. You can also freeze slices for up to 3 months.
To get a soft crust, brush the top with butter after baking or place a dish of water in the oven for steam during baking.
Yes, you can freeze the dough after the first rise. When ready to bake, let it thaw and rise again before baking.
Other bread recipes
- Banana Bread Pudding
- Best Bread Pudding Recipe
- Olive Garden Breadsticks Copycat Recipe
- Homemade Breadtwists recipe
- Best Ever Moist Zucchini Bread Recipe
- Banana Bread Recipe
- Milk Bread Recipe
- Homemade Rice Bread Recipe
- Bread in 5 Minutes
- Cheesy Garlic Bread
So, If you enjoy, please Follow my facebook page to be notified every time I publish a recipe!
Love this recipe? Give it a ⭐⭐⭐⭐⭐ review in the recipe card below!
Sandwich bread recipe
Equipment
- 1 stand mixer with hook attachment (or a bowl and your hands)
- 1 loaf pan
- 1 Rubber Spatula or wooden spoon
- 1 digital kitchen scale
- 1 pastry brush
Ingredients
- 1 cup 240 ml water, warmed to approximately 110°F (43°C)
- 1/4 cup 60 ml whole milk, warmed to approximately 110°F (43°C)
- 2 1/4 teaspoons 7 g Platinum Yeast from Red Star instant yeast (1 standard packet)
- 2 tablespoons 25 g granulated sugar
- 4 tablespoons 1/4 cup; 56 g unsalted butter, softened to room temperature
- 1 1/2 teaspoons salt
- 3 1/3 cups about 420–430 g all-purpose or bread flour (spooned and leveled), plus additional as needed
Instructions
- Prepare the Dough: In the bowl of your stand mixer fitted with a dough hook or paddle attachment, whisk together the warm water, warm milk, yeast, and sugar. Cover and let sit for 5 minutes. Add the butter, salt, and 1 cup of flour. Mix on low speed for 30 seconds, then scrape down the sides of the bowl. Add another cup of flour and mix on medium speed until mostly combined (some butter chunks may remain). Add the remaining flour and continue mixing on medium speed until the dough comes together and pulls away from the sides of the bowl, about 2 minutes. If you don’t have a mixer, use a large wooden spoon or silicone spatula, though it will require some effort!
- Knead the Dough: Keep the dough in the mixer and knead for an additional 5–8 minutes, or knead by hand on a lightly floured surface for the same amount of time. If the dough becomes too sticky, add 1 teaspoon of flour at a time to make it soft and slightly tacky. Avoid adding too much flour to prevent a dry dough. The dough should feel a bit soft and bounce back slowly when poked. You can also perform a “windowpane test” by stretching a small piece of dough until it’s thin enough for light to pass through. If it stretches without tearing, it’s ready. If not, keep kneading.
- 1st Rise: Lightly grease a large bowl with olive oil or nonstick spray. Place the dough in the bowl, turning to coat all sides with oil. Cover and let rise in a warm environment for 1-2 hours, or until doubled in size. For a faster rise, you can refer to my Baking with Yeast Guide.
- Shape the Bread: Grease a 9×5-inch loaf pan. Punch down the risen dough to release air. Lightly flour a work surface, your hands, and a rolling pin. Roll out the dough into a large rectangle, about 8×15 inches. Roll it up into an 8-inch log and place it in the prepared loaf pan.
- 2nd Rise: Cover the shaped loaf with aluminum foil, plastic wrap, or a clean kitchen towel. Allow it to rise until it’s about 1 inch above the top of the loaf pan, about 1 hour.
- Bake the Bread: Adjust the oven rack to a lower position and preheat the oven to 350°F (177°C). Bake the bread for 30-34 minutes, or until golden brown on top. If the top browns too quickly, loosely tent the pan with aluminum foil (usually around the 20-minute mark). The bread is done when it sounds hollow when tapped or an instant-read thermometer reads 195–200°F (90–93°C) in the center.
- Cool and Store: Remove the bread from the oven and let it cool in the pan for a few minutes before transferring it to a cooling rack. You can slice it after it cools, or let it cool completely before slicing. Store leftover bread tightly at room temperature for up to 6 days or in the refrigerator for up to 10 days.


Love this recipe? Give it a ⭐⭐⭐⭐⭐ review in the recipe card below!